Easy DIY | Salt Dough Santa Handprint Christmas Tree Ornaments

I think this could also make for a sweet gift to give to grandparents or loved ones that's a little more thoughtful and meaningful. Make these ornaments and pair it with a meaningful art print or canvas here and you’ll easily be known as the most thoughtful gift giver this year :)

I love pulling out our ornaments year after year, remembering when we made them together and seeing their little creations over and over again. I'll be cherishing these until they’re all old and gray!
We kept the kids home from school earlier this week due to colds going around. So to make the day a little less of a bummer I told them all to get on their Christmas jammies and go cuddle up on the couch to watch a holiday movie so we could make it a fun Christmassy day. After the movie we decided to finish up these Santa handprint ornaments we had cut out and baked the night before.
I posted these on Instagram after we were finished and received a handful of messages asking how we made them. So I thought I’d share it here so you’d have a reference to come back to in case you want to make some of these funky, but cute, ornaments to cherish when your little ones are all grown up too. :)


__
Here’s how we made them:
I googled a salt dough recipe to make the dough for the ornaments. I’ve used this recipe multiple times and they all have held up really well so far over the years.
Salt Dough Recipe:
This batch is enough to make about 4 hand prints for tiny hands. Since I have a lot of kiddos, I usually double this recipe.TIP: Make a little extra so you have left over dough for your kids to play with for hours on end. My kids ages 1 to 10 all love playing and creating with it!
4 cups flour
1 cup salt
1.5 cups water
Heat oven to 200º (F)
Instructions:
1. Mix together to form dough. I used my kitchen aid to mix and then my hand to knead it together more once the dough was formed. If the dough is too stiff add a little more water. Or if it is too soft, add a little more flour.
2. Take small sections of the dough to form smaller balls. This makes is easier to roll out.
3. Roll out dough onto parchment paper using a rolling pin. Roll your dough side to side and up and down to get a nice large square-ish section big enough for a couple hands to fit on. make sure you leave it about ¼ inch to ½ thick. You don’t want the dough to be too thin so it doesn’t break once cooked.
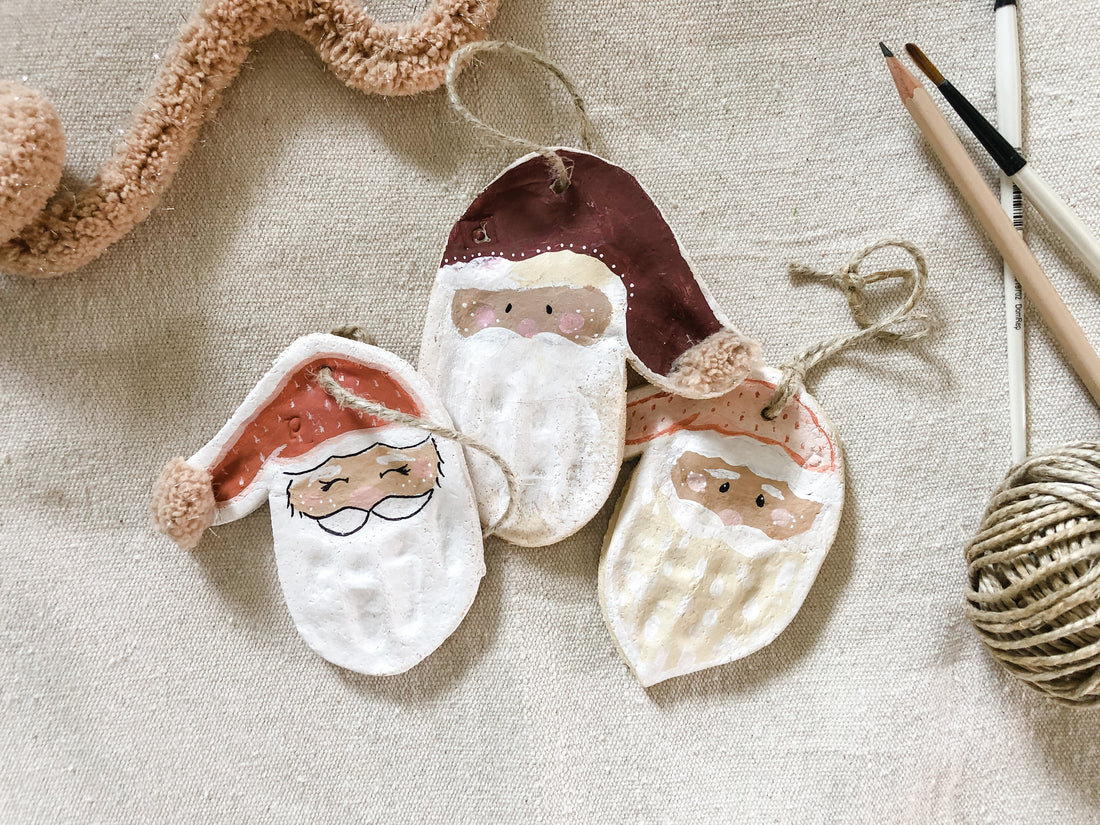
4. Once your dough is all smoothed out, place your kids hand on top of the dough. To get a good Santa beard, have your kid put 4 fingers together and the thumb sticking out where you would want the end of the Santa hat to be once finished.
5. Press down on their hand a little at a time making sure all parts of the hand and fingers are smooshed into the dough. Gently lift the hand up off the dough.
6. Now take a sharp knife and cut about a ½ inch border around the hand print. This will allow you to see the hand print well enough when the ornament is done.
7.Next, take a lollipop stick or straw to make a hole at the top of the ornament. Make sure the whole is large enough to fit whatever string you are going to tir through in the end.
8. Once you make all your hands and cut them out, place them on a cookie sheet and bake at 200º (F) for 90 minutes to 2 hours. Keep checking on them to make sure they don’t burn. Once they’re hard to the touch they should be ready enough.
9. Let them cool for about 2 hours or more before painting.

Painting Instructions:
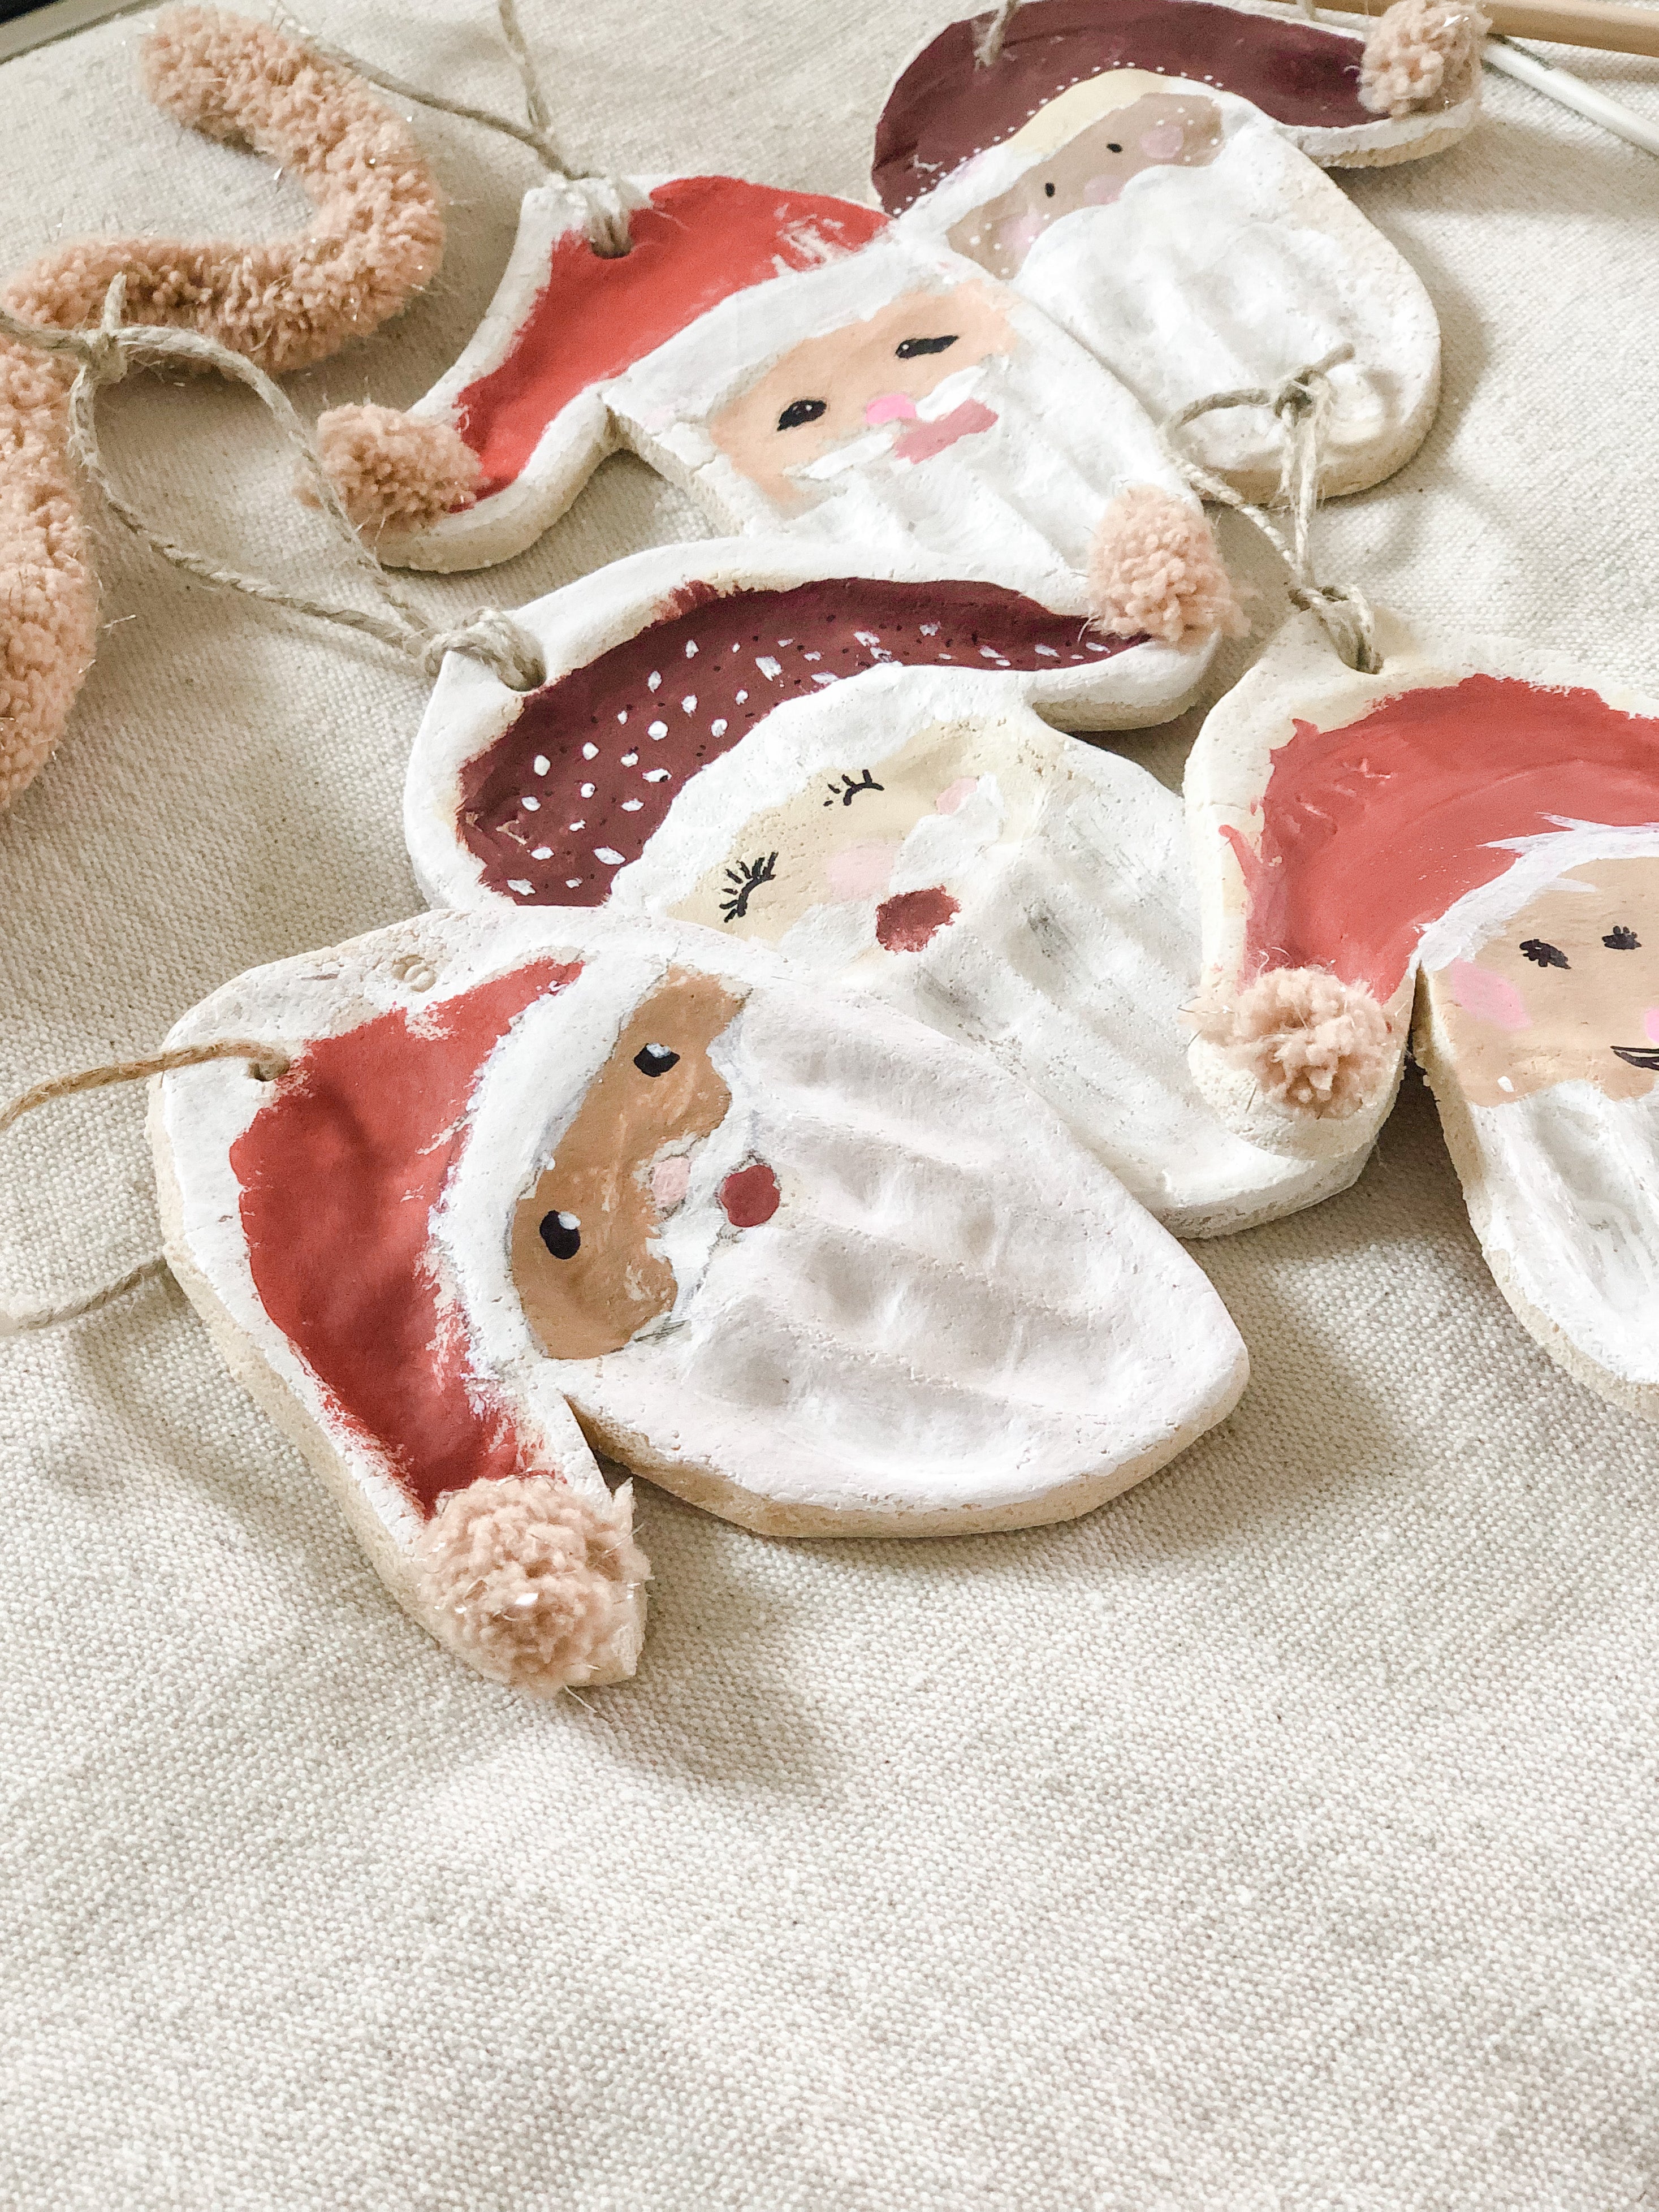
1.Once your ornaments are cooled, lightly draw on your Santa face where you want his had to end and face to go. (see my picture above).
2. I use acrylic water based craft paint for all the projects I do with my kiddos and its super easy to clean and use for them. low Let them paint and be creative!
3. When your ornaments are all painted, use ribbon, string, or jute to tie through your hole. Have your kiddo sign the back with their name, age and date so you always have this to remember.
4. Optional: Take some yarn, felt or a cotton ball to hot glue to the end of your Santa's hat to add a little pop and texture to your ornament.
And there you have it! Hope this project will allow you to make this a fun and sweet memory with your kiddos too and have something special like this to hang on your tree year after year. Merry Christmas, friends!
PAINT COLORS WE USED:
Most of these paints are from Michael's or Walmart craft section. I like the Apple Barrel brand or Craft Smart (Walmart). I also like to choose colors that are cohesive and would match well with the rest of our tree ornaments. That way when no matter how your kids paint them, they will still turn out pretty and go well with the rest of your Christmas decor--easy hack! :)
Here are the colors I used for these particular ornaments:
Apple Barrel Brand:
White
Antique White
Warm Buff
Cardinal Crimson
Chesnut
Peach
Natural Beige
Craft Smart Brand:
Brick Red
Terracotta
And for the black outline and eyes I used a fine point sharpie.


Share your creations with me and tag me (@coleykuyperart) on Instagram and Pinterest. I'd love to see!
_________________________________________


15 comments
Sorry! Saw them!
Thank you so much! Love these! Do you happen to know the paint colors you used? Thanks!
Thank you Allana! I’m so glad you enjoyed this. I hope you start making some precious memories together.
Love the paint colors- any idea what they are called?
Hi! Can you share which brand of paint you used,and which colors?